This example will show how to convert a ShaderToy shader into a reusable component inside the Umajin Editor. If you have not read the first tutorial, you should read that first.
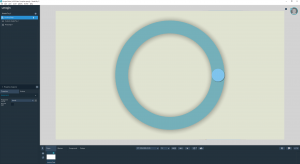
We will start with this example and import that into the Umajin Editor. You should now have the spinner inside the editor like this.

Next we will modify the shader to expose some parameters to the Umajin Editor interface so that designers can easily tweak the look and feel of the component without using code.
First add the following parameters to the shader JSON definition file.
{
   "type" : "float3",
   "name" : "background_color"
},
{
   "type" : "float3",
   "name" : "ring_color"
},
{
   "type" : "float3",
   "name" : "ball_color"
},
{
   "type" : "float",
   "name" : "ring_thickness"
},
Then add the shader uniforms to the glsl and Vulkan shaders and update the shaders to use the supplied values rather than hard coded.
GLSL:
uniform vec3 background_color;
uniform vec3 ring_color;
uniform vec3 ball_color;
uniform float ring_thickness;
Vulkan:
layout(std140, set = 2, binding = 0) uniform CustomUniform
{
   // Umajin does not tightly pack values into the custom uniform buffer currently.
   // Each member will be at a 16 byte offset from the previous member regardless of size.
   layout(offset = 0) float umajin_time;
   layout(offset = 16) vec2 umajin_window_size;
   layout(offset = 32) vec3 umajin_cursor;
   layout(offset = 48) vec3 background_color;
   layout(offset = 64) vec3 ring_color;
   layout(offset = 80) vec3 ball_color;
   layout(offset = 96) float ring_thickness;
} customUniform;
Finally we edit the Javascript definition to expose the parameters to the Umajin Editor interface and link the parameters to the shader.
Edit where registerComponent is called to add properties to the component. Note that here we also register for the onRefresh event so we can update the values as they are changed in the editor.
registerComponent(
 'shaderToy',
 '',
 'ShaderToy',
 'Shows ShaderToy example',
 'shaderToy_onInit',
 'shaderToy_onResize',
 'shaderToy_onRefresh',
 'color:Back Color:0xdce3d3ff,\
color:Ring Color:0x75B0BBFF,\
color:Ball Color:0x80C4EDFF,\
real:Ring Thickness:0.1:0.01:0.15',
'');
Inside the onRefresh callback add the following to get the updated component information and set the properties on the shader.
var backgroundColor = getData(self, "Back Color")
var r = parseInt(backgroundColor.slice(2, 4), 16) / 255.0
var g = parseInt(backgroundColor.slice(4, 6), 16) / 255.0
var b = parseInt(backgroundColor.slice(6, 8), 16) / 255.0
var a = parseInt(backgroundColor.slice(8, 10), 16) / 255.0
shaderUpdateUniformFloat3("shader_toy", "background_color", r, g, b)

var ringColor = getData(self, "Ring Color")
var r = parseInt(ringColor.slice(2, 4), 16) / 255.0
var g = parseInt(ringColor.slice(4, 6), 16) / 255.0
var b = parseInt(ringColor.slice(6, 8), 16) / 255.0
var a = parseInt(ringColor.slice(8, 10), 16) / 255.0
shaderUpdateUniformFloat3("shader_toy", "ring_color", r, g, b)

var ballColor = getData(self, "Ball Color")
var r = parseInt(ballColor.slice(2, 4), 16) / 255.0
var g = parseInt(ballColor.slice(4, 6), 16) / 255.0
var b = parseInt(ballColor.slice(6, 8), 16) / 255.0
var a = parseInt(ballColor.slice(8, 10), 16) / 255.0
shaderUpdateUniformFloat3("shader_toy", "ball_color", r, g, b)

var ringThickness = getData(self, "Ring Thickness")
shaderUpdateUniformFloat("shader_toy", "ring_thickness", ringThickness)
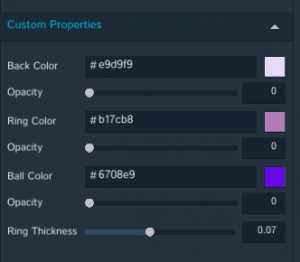
Now you will see the properties exposed in the custom properties section on the properties panel.

To reference the files created for this example see the github repo.
Creating multiple instances.
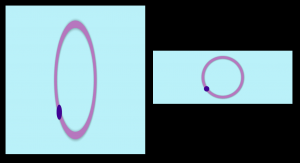
If you wish to create multiple instances of the component in a project you will run into the following issue, shader values for components are per shader not per instance. This manifest itself as the following issue:

A future Umajin Editor release will have a system to avoid this issue by allowing creation of unique instances of shaders and apply the instance to a specific RenderKit component.