You can import your ShaderToy code for use in Umajin projects. Just note that ALL contributions to the Shadertoy site have individual licensing requirements and many are not available for commercial use or are available only with special conditions. Please make sure to read carefully and comply with any licensing instructions for the individual shaders you intend to use. Umajin does NOT check or enforce licenses for 3rd parties; it is your responsibility to understand the conditions of use for any code that you add to an app you create using the Umajin tools.
Requirements
First checkout or download the Umajin shader includes project from GitHub and look inside the “ShaderToy Example” folder.
ShaderToy is written in GLSL ES which Umajin supports on Android and Windows. The ShaderToy examples can also be compiled into Vulkan shaders which Umajin supports on Windows, MacOS and iOS. If you wish to compile your shaders for Vulkan you will need the tool glslang available from the Vulkan SDK. Version 1.2.170.0 is known to work at the time of writing but any later versions will most likely work as well.
This example will focus on converting a simple shader for use in Umajin Editor, open this for reference.
Initial setup
- Create a new blank Umajin project and then select File -> Open Resources Folder.
- Open the script folder and copy the “shadertoy.js” file from “umajin-shader-includes/ShaderToy Example”
- Return one folder up in the resources folder and open the effects folder.
- Copy the following files from the “umajin-shader-includes/ShaderToy Example” folder to the “effects” folder in your projects resources folder:
- shader_toy.json
- shader_toy_vs.glsl
- shader_toy_fs.glsl
This will get all the basic files in place for adding our sample shader to this Umajin project. We will cover OpenGL first as it is the simplest, however, this is only supported on Windows and Android. If you wish to convert to Vulkan for MacOS and iOS continue to read the following sections as they are still relevant.
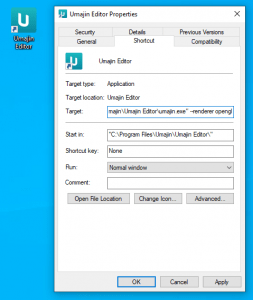
To force Umajin Editor to run using OpenGL on windows edit the desktop shortcut created on installation. Right click and select properties on the icon. In the Target field, add --renderer opengl after the path to umajin.exe (also after the double quote)

Now, when you run Umajin Editor from this shortcut it will run in OpenGL. To confirm this, look in the title bar of the editor where you will see ‘opengl’ in the title.
Add component to your project

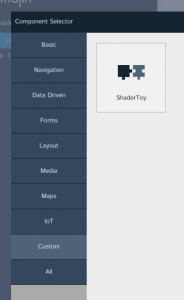
Now open your project and add the ShaderToy component to your project. You should size the component to fill the screen and insert a black rectangle component behind it (some shaders rely on alpha-blending to black).
You will now see and error in the console log stating:
Failed to compile fragment shader.0(32) : warning C1503: undefined variable "mainImage"
0(32) : error C1008: undefined variable "mainImage"
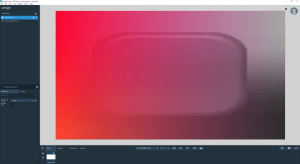
This is because the example shader is missing the main content of the ShaderToy code. So now open the fragment shader found inside your projects resource folder effects/shader_toy_fs.glsl inside a text editor and copy the entire contents of the shader from the example into the shader between the two large comment code blocks. Save the file and switch back to Umajin Editor, it will reload the new shader and should look like this.

This looks similar but we can see the texture which is sampled is not the same as expected. Next we will show how to supply custom images to the shaders.
Supply custom images
If you open the shadertoy.js file, you will see the following code in the shaderToy_onInit method.
shaderUpdateUniformTexture("shader_toy", "iChannel0", "images/button_01_default_9.png")
shaderUpdateUniformTexture("shader_toy", "iChannel1", "images/scrollbar_h_9.png")
This sets the first two textures to images which are supplied with all Umajin projects as default images. These are found in the images folder of the projects resource folder. Simply add your own images to that folder and update the shadertoy.js file to use the new filenames and you will see them show when the editor reloads its image content.
The time only animates when in play mode, so press the play button to see the color animate like the original ShaderToy example.
Vulkan Support
To run Umajin Editor using the Vulkan renderer on Windows, you do the same thing as you do for forcing it to run in OpenGL, but replace --renderer opengl with --renderer vulkan. On MacOS and iOS Vulkan is the only rendering option so there is no setup required. The setup for the project will be the same as for OpenGL, however we need to copy the following files and compile them.
- shader_toy.vert
- shader_toy.frag
- vulkan_common.glsl
To compile your shaders for Vulkan, you will need to install the VulkanSDK. On Windows VK_SDK_PATH will be added to your path and for MacOS glslangValidator should be installed to /usr/local/bin/glslangValidator so it will be available on from the terminal. It does not matter which platform you compile your Vulkan shaders on, the resulting file will be cross platform compatible. The compileShaders.bat shows how to compile on Windows while compileShaders.sh is used for MacOS.
The type of shader (vertex or fragment) will be determined via the .vert or .frag extension on the input filename. The path to vulkan_common.glsl is important, in the umajin-shader-includes repository it is at the root level, for your project you will probably want to add it to the shaders folder and adjust the vulkan shader to remove the ../ from the path to vulkan_common.glsl