
Overview
This tutorial is a quick introduction to how Umajin works with BLE devices. First, we’ll create an ESP32 BLE server, and then we’ll develop an app by Umajin Editor to communicate with the ESP32 board.
Prerequisites
- Umajin App Editor downloaded and installed
- An ESP32 Board
- A Smartphone with Bluetooth and Umajin Lite
- Any text editor
Pro Tip: using Visual Studio Code as your editor will allow you to integrate debugging.
Instructions
Creating an ESP32 BLE Server
- Select your board
I assume that you have already installed the ESP 32 Add-on on Arduino IDE.
If not, the link below will help you
– Download the Arduino IDE
– A tutorial of Installing ESP32 Board in Arduino IDE
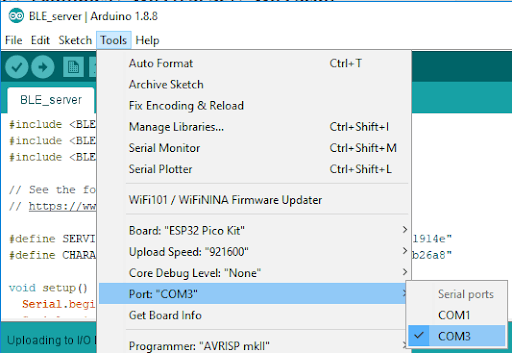
Open the Arduino IDE, and select your board from the Tools menu - Select the Port in the Arduino IDE
- Create an ESP32 BLE Server
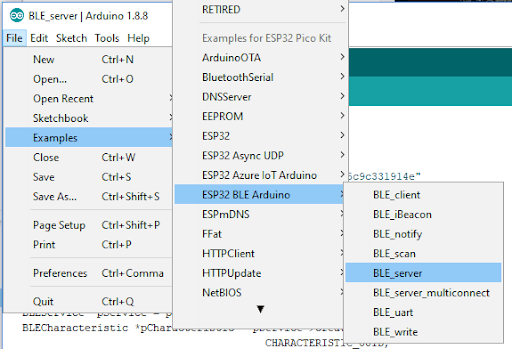
Navigate to File > Examples > ESP32 BLE Arduino and select the BLE_server (more about this example, please follow this link)
- Get the Service UUID and Characteristic UUID
We need the Service UUID and Characteristic UUID in our Umajin Code. You can use the default UUIDs, or you can go to uuidgenerator.net to create random UUIDs... #define SERVICE_UUID "4fafc201-1fb5-459e-8fcc-c5c9c331914b" #define CHARACTERISTIC_UUID "beb5483e-36e1-4688-b7f5-ea07361b26a8" ...
- Change the device name
In the following function, you can change the name to anything you want.
void setup() {
  ...
  BLEDevice::init("Long name works now");
  ...
}
In this case, I’ve changed the device name to Umajin, so the code should look like,
void setup() { ... BLEDevice::init("Umajin"); ... } - Setting the Characteristic
We set the characteristic to below. “Hello World says Umajin” is the word to be expected.void setup() { ... pCharacteristic->setValue("Hello World says Umajin"); ... } - Start the Service and Start Advertising
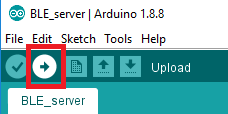
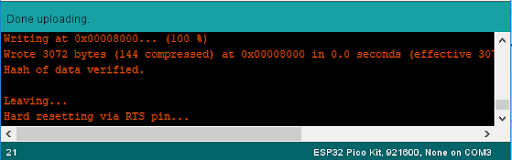
Make sure your ESP32 is connected and then upload the code to the board
It might take several minutes to finish
- Select your board
Developing an App
Umajin's built-in functions allow you to communicate with BLE devices, you can find this information by searching the keyword "bluetooth" in our documentation https://developer.umajin.com/jsmain/
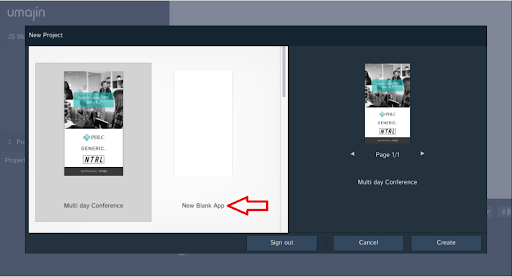
- Create a New Blank App in the Umajin App Creator
- Create a new JavaScript file and name it “ble.js”. Then copy the code
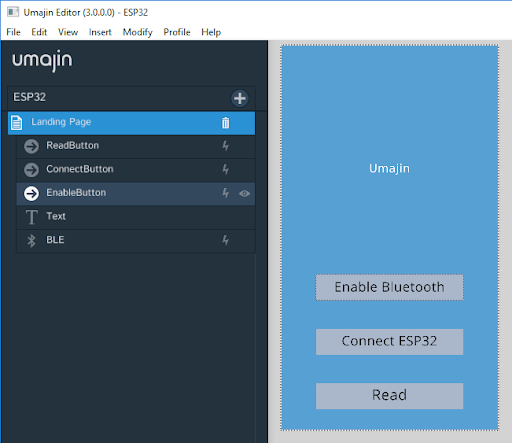
https://gist.github.com/Umajin/190825626f9cb731b69a63c85887d564 and paste it to ble.js. Make sure the service UUID and the characteristic UUID in your code is the same as 1.4 - Click the ‘Add Component’ Button
 to add one “BLE”, one “Text” and three “Button” components to your “Page”. Change the display name and title as below.
- Click the BLE component and set the action.
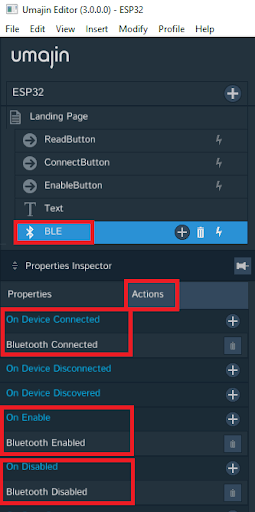
- Same as the step d, set the “On Press” action of “EnableButton” to “Enable Bluetooth”, set the “On Press” action of “ConnectButton” to “Connect to Bluetooth Device” with the Device ID from 1.5 (in this case is Umajin).
Assign function “Read ESP32 ” to the “On Press” action of “ReadButton”. - Save your project and test it on your phone.
- Create a New Blank App in the Umajin App Creator
Troubleshooting
- Can this app be used on iPhone?
Sorry, this app is only available on Android based phones at this time. - The app cannot connect to the ESP32.
Confirm that the Device ID, Service UUID and Characteristic UUID are the same in the Umajin code and in the Arduino IDE code.