Overview
Learn how to use the Set Global Variable Action, and the getGlobalVar and setGlobalVar JavaScript functions to set variables that are accessible all throughout a project. In this example, we use it to set the background color of an application and to change the font across an app. This could be useful for letting users customize their experience, for enabling parental controls on a project, for customizing greetings and many other purposes.
Prerequisites
- Umajin Editor downloaded and installed.
- [Optional] Any text editor.
- [Optional] Completed tutorials for Custom Feeds and Custom Actions
Pro Tip: using Visual Studio Code as your editor will allow you to integrate debugging.
Instructions
If you are looking for a tutorial purely on using Global Variables with JavaScript, skip to step 9. While writing custom JavaScript Actions with Global Variables can be incredibly powerful, Umajin also provides built-in methods to use Global Variables in the graphical editor. Umajin provides the “Set Global Variable” Action to set the value of any Global Variable. The Global Variable can then be used as a parameter of an Action, simply by wrapping the variable name in square brackets like the Color parameter of this Action:
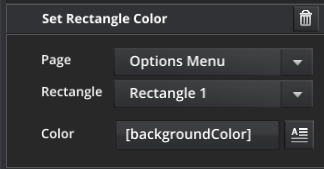
Whenever the Action runs, it will use the value of the Global Variable as its parameter. We can use this fact to make a simple way to change the background color of all of an project’s pages.
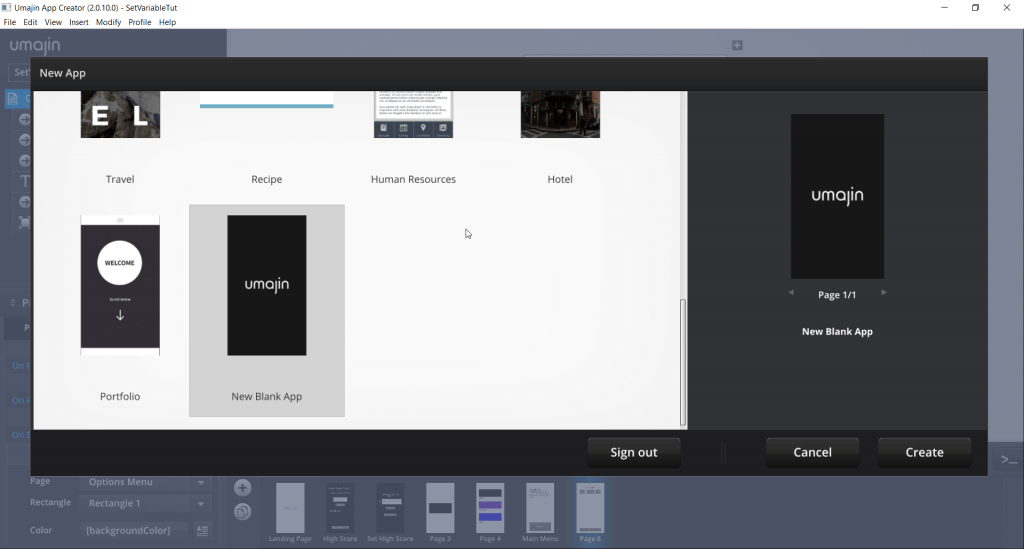
Step 1) Make a new blank project in the Umajin Editor for testing
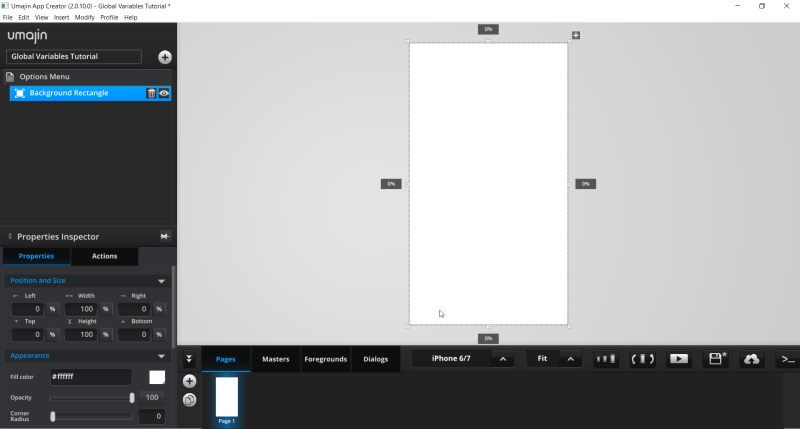
Step 2) Create a new page called “Options Menu”. Add a Rectangle Component that covers the entirety of the page. If you are adding it to an existing. Mine is named “Background Rectangle”.
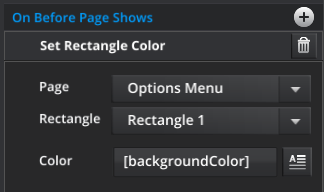
Add a “Set Rectangle Color” Action to the “Before Page Shows” callback of the page. Select the Rectangle Component you made for the first option, and put “[backgroundColor]” as the color. You will need this Action and a Rectangle Component on every page that you want the custom background color.
Step 3) Make a Button Component labeled with the color of your choice. I chose blue. Add the Action “Set Global Variable” to the ‘On Press’ callback of the Button. You can find the Action under the Advanced tab of the action picker (scroll down) or by using the search bar.
The “Set Global Variable” option has two fields. One is the name of the variable to set, the other is the value to set it to.
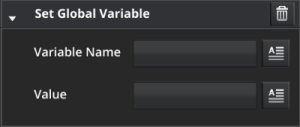
Step 4) Set the variable name to “backgroundColor” and the value to the RGBA hex color value of the background color it should set. For blue, I put “0x3498DBFF”.
Note: Umajin uses RGBA colors which is different to many other tools which use only RGB color sequences. RGBA colors are similar to RGB but add an Alpha (or transparency) channel to the color sequence. This determines the opacity of the color or how much other colors bleed through this one in a range from 00 (fully transparent/clear) to FF (fully opaque/solid). To use an RGB color in an RGBA application, you merely add FF to the end of the 6 character RGB sequence to denote that the color should be fully opaque (or solid).
Step 5) Add the “Show Page” Action underneath the “Set Global Variable” Action. Set it to show the current page. This is to refresh the page so that the background color will change when you press the button.
Step 6) Copy and paste the Button Component in the object list to make several buttons. Change the labels and hex values as you want. For my buttons I used Blue (0x3498DBFF), Green (0x1AB9BEFF), and Purple (0x7764B1FF).
Step 7) Run the application and try changing your background colors!

Step 8) Adding another page
So far what you’ve done could have been done easily enough by just changing the color of the rectangle directly from the button. We can now add another page to show just why you would want to use global variables.
Create a new page, and call it “Main Menu”. Create a Rectangle Component that covers the entire background like in step 2, and add the “Set Rectangle Color” Action to the “Before Page Shows” callback. Make sure to select the Rectangle and set [backgroundColor] for the color.
Then add a Button to this page and to the options menu that switches back and forth. Now you can see that the background color changes on all pages of the project when you change the Global Variable.

Step 9) Further ideas:
Try adding other pages (and Buttons to get to them!) Remember that you’ll need to create a background Rectangle and use the “Set Rectangle Color” Action to make it change color to what you want.
The current project starts with a black background until you hit one of the buttons. One way to change this is to set the global colorBackground variable to be one of the colors when the page first loads. Of course, this means that user preferences wouldn’t be saved. This is the perfect place to try out the getCookie, setCookie, and deleteCookie tutorial to save user preferences.
Step 10) JavaScript coding with Global Variables.
Now that you have a basic understanding of using Global Variables with the graphical editor (or if you skipped over that section), we will learn how to use them with custom JavaScript code. For this section of the tutorial, you will need to have the optional pre-requisites completed. In this section of the tutorial, we will create a Text Entry Component that users can use to set the background color to whatever they want it to be. We will then create several Buttons to change the font type for a Text display component in another page.
Umajin has two JavaScript functions that can be used to interact with Global Variables:
setGlobalVar(key, value)
| NAME | TYPE | DESCRIPTION |
| key | string | is the key to write to |
| value | string | is the value to write |
| NAME | TYPE | DESCRIPTION |
| key | string | is the key to read from |
setGlobalVar sets the value of the Global Variable with the key passed in to be the value passed in, and getGlobalVar returns the value of the Global Variable with the key passed in.
We are going to make two functions, one to set the font type of an object to a Global Variable, and one to set a Global Variable from a Text Component.
Create a new JavaScript document in the project’s scripts folder. You can access the folder by going through File → Open Resources Folder → Navigate to the scripts folder. If you are editing with Visual Studio Code then you can go to File → Open With Visual Studio Code.
Create a new file with a filename related to the purpose of your scripts (I chose “globalOptions.js”) and give it a “.js” ending. Save it in the scripts folder for your project.
Step 11) Using the setGlobalVariable function in JavaScript:
Add the following to your JavaScript file:
registerAction("setGlobalColorFromTextEntry", "", "Set Background Color From Text Entry", "component:textbox");
// register the function so that Umajin recognizes it as an action.
function setGlobalColorFromTextEntry(textEntry) {
   var color = getProperty(textEntry, "text"); // get the entered text
   if (color.length == 6) // some simple validation, the user can enter just the hex values
       setGlobalVar("backgroundColor", "0x"+color+"ff");
   else if (color.length == 8)
       setGlobalVar("backgroundColor", "0x"+color);
   else
       console.log("Invalid color entered in text entry field"); // log the error
}
You can copy it directly, or write your own version.
The relevant part is this:
setGlobalVar("backgroundColor", "0x"+color);That function call sets the Global Variable names “backgroundColor” to be the string “0x” combined with the string entered by the user.
Most of the rest of the function is a simple validation to ensure that a color is entered in. Note that in no way is it comprehensive — six Zs will make it through the checks.
Save the file and go back to the Umajin Editor. Reload the project (File → Reload) in order to gain access to your new Custom Actions.
Make a Text Entry Component and a ‘Submit’ Button Component. Under the ‘On Press’ event add your custom “Set Background Color From Text Entry” Action, and select the Text Entry Component as the component parameter. Enter some hex codes and off you go!

Step 12) Using the getGlobalVariable JavaScript function
Add the following code to your JavaScript file:
registerAction("setComponentFontType", "", "Set Font Type", "component:inComponent");
function setComponentFontType(inComponent) {
   var fontFilename = getGlobalVar("fontType"); // get the global variable value
   setProperty(inComponent, "font_filename", fontFilename);
}
You can copy it directly or write your own version. You may need to reload the project in order for the action to appear in the list of actions (File → Reload).
The relevant portion is:
getGlobalVar("fontType");That function returns the string value of the global variable called “fontType”. The custom action sets the font_filename property of the text component parameter to the filename stored in the global variable, thus changing the font. Much like the “Set Rectangle Color” action used earlier in the tutorial, this action should be run before each page loads.
In order to test out this function, add a box of example text to the Main Menu page, and add the new Custom Action to “On Before Page Shows” with the example Text Component as the parameter.
In order to customize the font type, add two Buttons to the options menu that set the Global Variable “fontType” to be any of the three default font filenames (vera.ttf, OpenSans-Regular.ttf, or SourceSansPro-ExtraLight.otf). I used one Button for vera.ttf and one for SourceSansPro-ExtraLight.otf.

Step 13) Further ideas:
Being able to use Global Variables in code and in the Umajin Editor gives developers and designers incredibly powerful tools to customize their projects. Global variables could be used for communicating high scores for a game, changing application settings, and much more. Combining this tutorial with the getCookie and setCookie functions can allow for saving user settings between sessions or personalizing accounts.
GIF of the Final Product:
